How to enable all processor cores in Windows 10
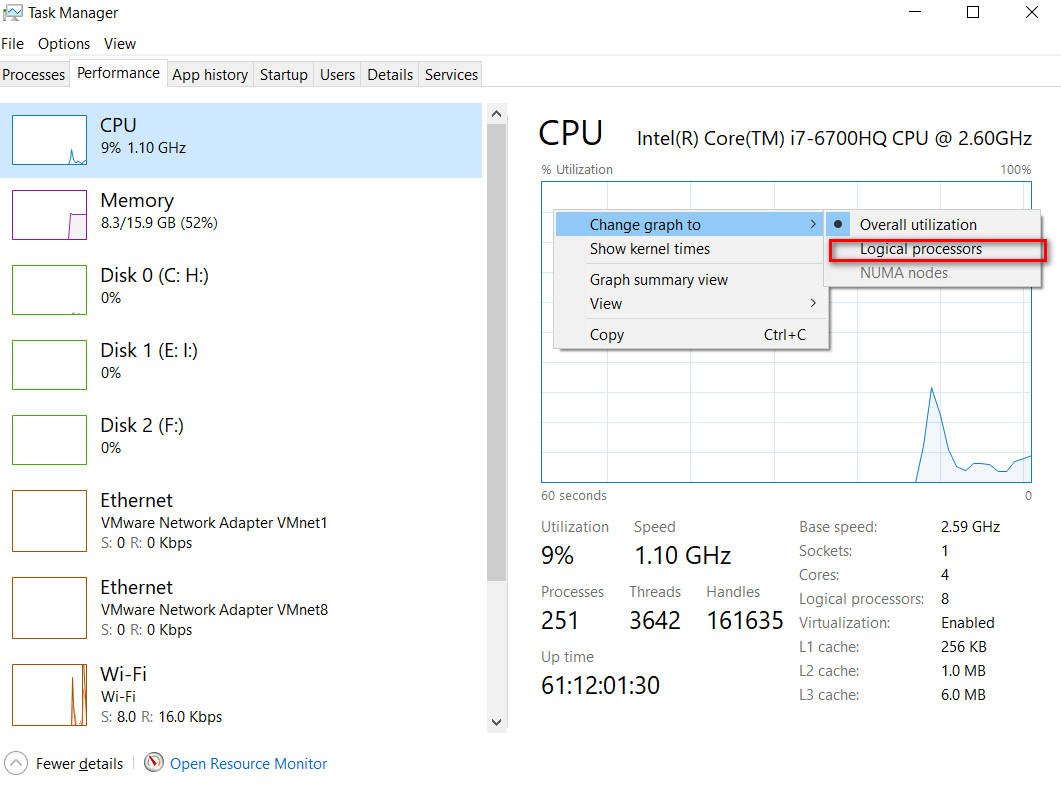
I’m sure you have heard the myth that if you enable all of the processor cores in Windows 10, the system will run faster. This is not a correct judgment and involving all cores will not lead to any performance result. The point is that motherboards use by default multi-core “All Core” in the BIOS itself and Windows 10 system works automatically for all cores. Don’t you believe it? Then open the task manager and see the load on all cores when using any actions in the system.
First of all, enabling all CPU cores or disabling 50% may allow the developer to check the application. Also, on some Windows 10 tablets, enabling all CPU cores may indeed help speed up the system, but this is a rare exception that needs to be checked in the Task Manager or the BIOS settings themselves. Energy efficiency in notebooks is also an interesting point. If a powerful notebook with a voracious processor, you can turn off a couple of cores to increase battery life.
Turning processor cores on and off in Windows 10
Press the key combination on the Win+R keyboard and enter msconfig.

Configuration of the system
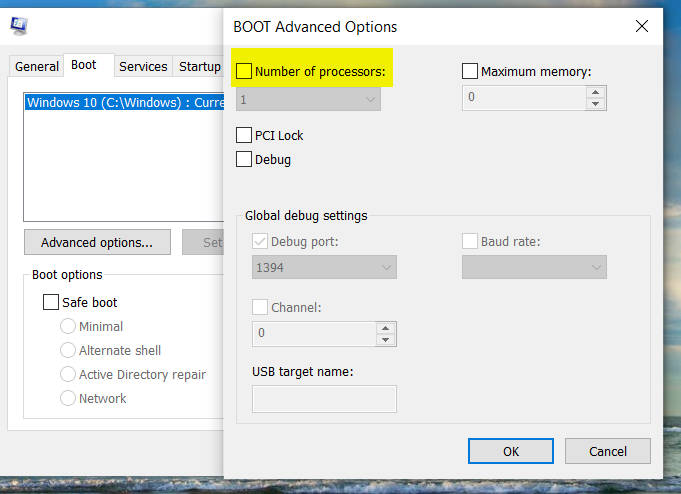
In the new window, go to the “Boot” tab, highlight the Windows 10 operating system and click on “Advanced Options” below. Another new window will appear, where the “Number of processes” column will appear. When the checkbox is not checked, Windows 10 runs on all cores automatically. If you want to reduce the number of cores, then put a checkmark in the box and select the number of CPU cores to run on the system.