How to enable and install Hyper-V in Windows 10 HOME
The Windows HOME edition (home edition) does not have Hyper-V virtual machine built-in, but there is a way to activate the feature to enable virtualization and install Hyper-V.
How to activate Hyper-V in Windows 10 Home Edition
Step 1: Right-click on a blank space on your desktop and choose Create > Text Document.
Step 2: Put the below script written by Microsoft Virtualization command on Github into a text document. Next, click on the tab at the top, “File” > “Save As”. In the “File Name” field, specify any name, but with a .bat extension and save it to your desktop.
pushd “%~dp0”
dir /b %SystemRoot%\servicing\Packages\*Hyper-V*.mum >hyper-v.txt
for /f %%i in (‘findstr /i . hyper-v.txt 2^>nul’) do dism /online /norestart /add-package:”%SystemRoot%\servicing\Packages\%%i”
del hyper-v.txt
Dism /online /enable-feature /featurename:Microsoft-Hyper-V -All /LimitAccess /ALL
pause
Step 3: On your desktop, right-click on the created bat file and select “Run as administrator”. Then a command prompt window will appear where you will be prompted to restart your computer by pressing Y.
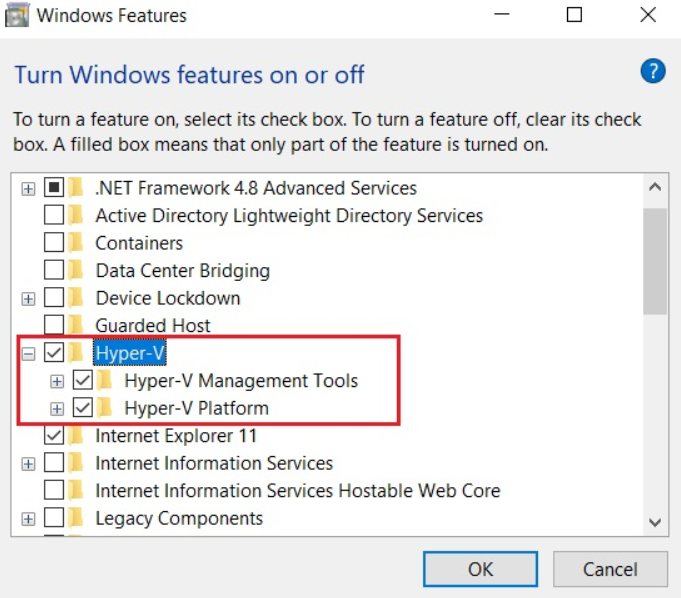
Step 4: Press Win+R and type optionalfeatures.exe to quickly open the system components. Find Hyper-V and check the box, then click OK.
Once all the necessary components are installed, you can type “Hyper” in the menu search and start the virtual machine in Windows 10 HOME.