How to use MSI Afterburner
MSI Afterburner – Utility from MSI, which is able to overclock your AMD or Nvidia graphics card to the maximum possible parameters, while preventing irreversible damage to the hardware.
In addition to GPU overclocking, there is also FPS monitoring, increasing or decreasing GPU fan speed, core voltage, temperature and power limitation. And the latest version of the program has a new feature called “Scanner”, which automatically detects the video card model and sets stable overclocking parameters.
MSI Afterburner features:
Overclocking – Allows you to use the GPU at its maximum capabilities without causing irreversible damage to the hardware. You can fine-tune settings such as core voltage, temperatures, power, fan speed, core and memory frequency.
Monitoring – All parameters that can be overclocked can be monitored in a special monitoring column to see which parameter needs to be increased or decreased.
Benchmarking – There is a built-in “Kombustor”, which provides detailed information about overclocking and how they will affect performance. Compatible with OpenGL and DirectX.
Video Capture – The Predator feature allows you to record games without missing a single frame, and records even in H.264 format. You can also adjust the frame rate limitation, quality, and compression types.
Fans – When overclocking the GPU, you need to consider the temperature. By increasing fan speed you can avoid critical overheating of the chip. Also, if they are too noisy and GPU temperature is normal, the rotation can be reduced to reduce the noise.
FPS counter – FPS is displayed in real time of the game process. This is convenient because you can compare the game before overclocking and after.
What you need to know to use MSI Afterburner?
MSI Afterburner is positioning itself as a safe overclocker for graphics cards, but it’s still a risk. I have described many errors on this site with a blue screen, and in some cases, it was overclocking your computer or laptop. If you encounter a BSOD in Windows 10, you will have to roll back the overclocking of the video card by default.
Three important buttons:
Resets overclocking settings to default. If you see critical temperature, Windows 10 blue screen errors, a quick default reset will save you.
Applies overclocking settings.
Saves profile with settings. You can create multiple overclocking configurations. For example, configure and save profile 2 as for games, and profile 1 can be created with minimal overclocking settings when you’re just on the desktop.
Download MSI Afterburner
Go to MSI official website and download Afterburner by clicking on “DOWNLOAD AFTERBURNER”, then unzip the archive and install the program by clicking on “.exe”.
1. Installing Kombustor in MSI Afterburner
Kombustor is not included by default to Afterburner and you have to download and install it separately. Go to the official geeks3d website and download Kombustor, then install it. Next, close the MSI Afterburner program if it was open and start it again.
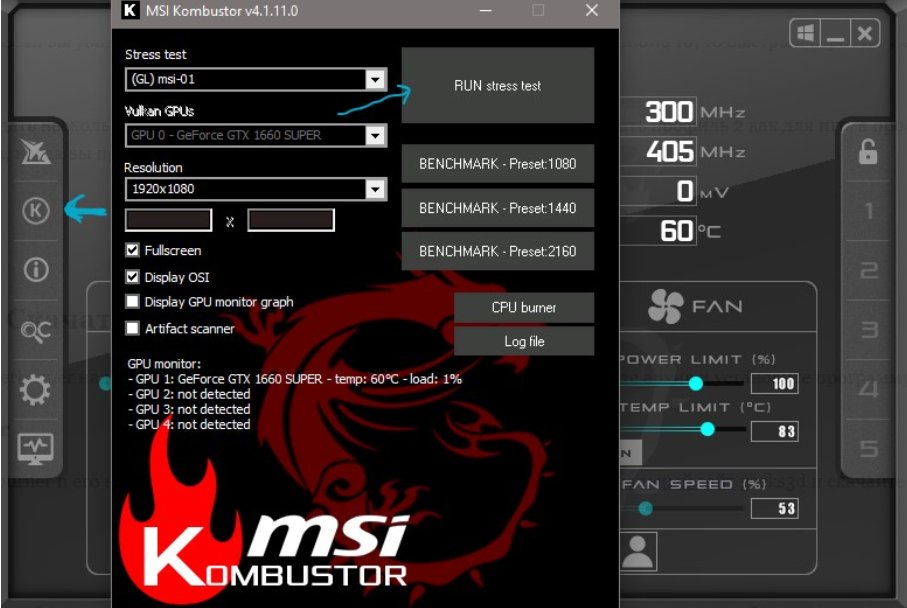
In MSI Afterburner you will now see the K – Kombustor button. Click it to start the benchmarking settings. Set the parameters for the test and click on “RUN stress test” to run the test. This will give you an idea of how your video card performs at a basic level.
2. Automatic overclocking
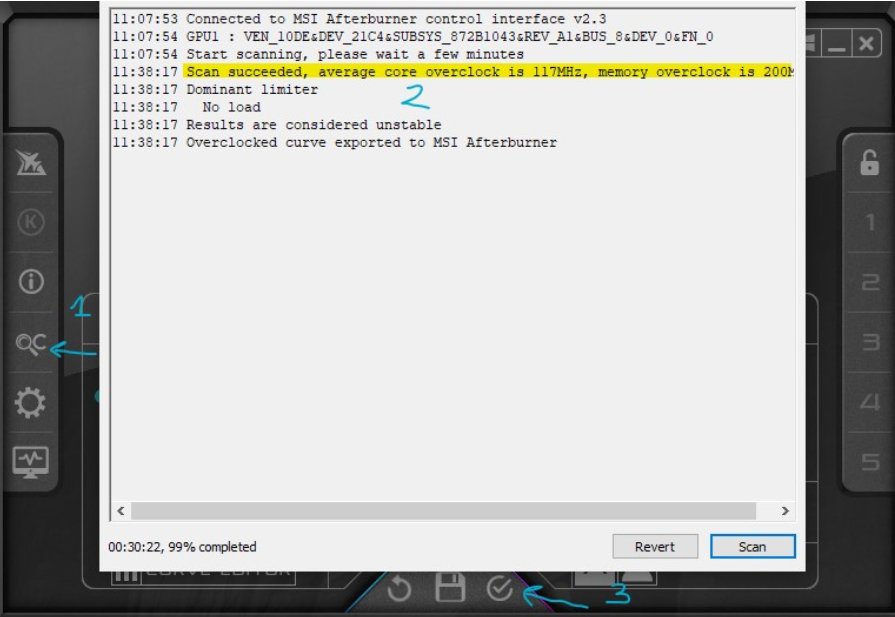
Start Afterburner and click on “Scanner” (the magnifying glass icon and C) which will automatically detect your video card, test it and choose the optimal overclocking parameters.
- Click on the magnifying glass icon to start Scanner. In the window that appears, click Scan. This can take anywhere from 30 minutes to an hour.
- After the test you will see “Scan succeeded, average core…” which means the test is finished.
- Close the window and click “Apply” at the bottom of the program. (checkmark icon).
Note: You will be shown your optimal overclocking parameters in “Scan succeeded…”. In my case it is +117 MHz for Core Clock and +200 MHz for Memory Clock.
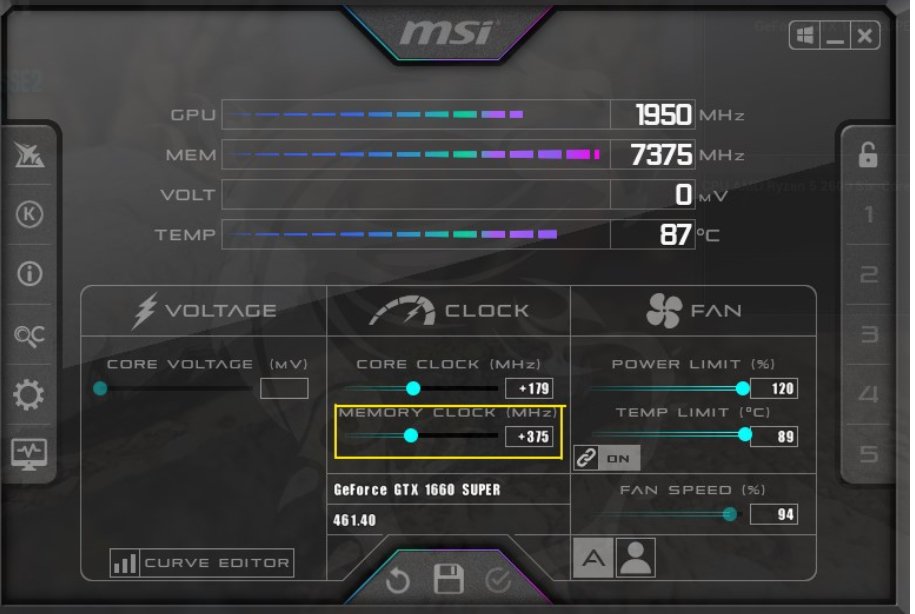
3. Manual overclocking
Here we will need to run Kombustor in background mode to see how your video card is improving and what the limits of its capabilities are, such as flickering, popping out, squares on the image and lags. I had a +7 FPS gain when adding +65 MHz. My limit was +179 MHz, as if more, the test would crash and sometimes show squares. It has to do with cooling as my GTX1660 Supre graphics card has only one fan.
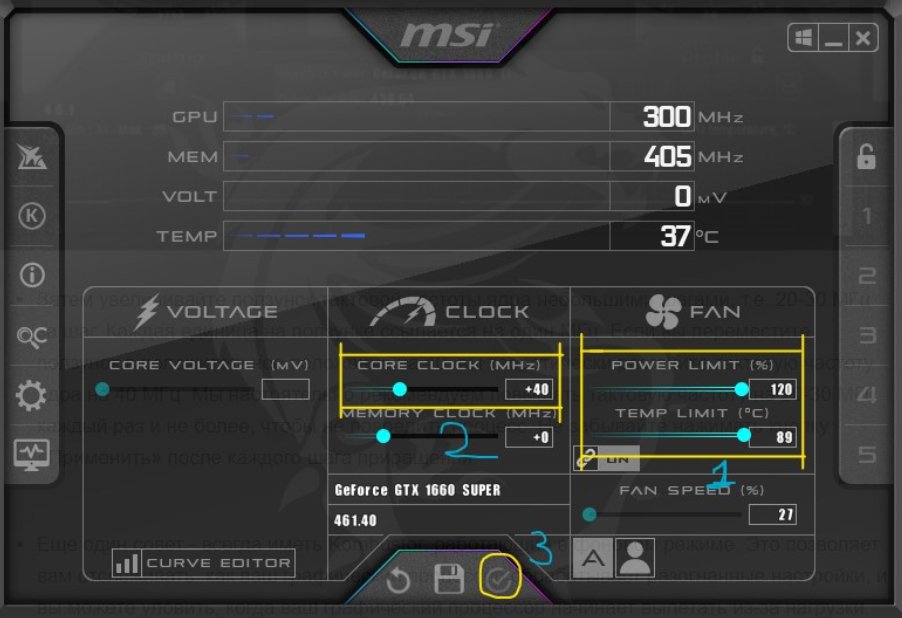
- In the FAN column set the “Power limit” and “Temp limit” sliders to maximum, then press apply.
- Under “Core Clock” set it to +20Mhz every time.
- Press “Apply” each time, after each addition.
Note: When crashes, lags and test crashes occur, but start lowering Core Clock by -5 MHz until crashes are eliminated.
I have determined the optimal Core Clock frequency for my card, now we can add the memory “Memory clock” frequency.
- Add “Memory clock” at +100 MHz each time you press apply. When you get to glitches, crashes, flickering, or braking in Kombustor, start reducing by -10 MHz until the glitches are eliminated.
Recommendation: I advise you to wait at least 10 minutes for the test in Kombustor to see if there will be any glitches when adding overclocking parameters to the video card.
4. displaying FPS and other parameters in the game
If you want parameters like FPS, GPU load, GPU temperature, etc. to be displayed during the game, click on the gear icon and go to the “Monitoring” tab. Here you will be able to configure a particular parameter that will be displayed during the game, customize its display as text or graphics.
Select the parameter you want to display in the game.
At the bottom, check the “Show ” box.
You can also adjust the color and display as text or graphics.
If you check the “Show in taskbar icon” checkbox, the selected settings will also be displayed on the Windows taskbar.
5. Adjusting the cooler rotation
If you are worried about the high temperatures of your graphics card at minimum load, you can increase the rotation of the cooler. Click on “Settings” and go to the “Cooler” tab, then check the “Enable software custom auto mode” box.
You’ll get a chart where you can manually set the speed of the cooler at a certain temperature. For example, I set the cooler speed to 90% at 60 °C.