
CPU Fan Error while Booting PC or Laptop – How to Fix?
The BIOS may give you a “CPU Fan Error! Press F1 to run SETUP” when booting a Windows 10 computer or laptop. The error tells you that there is a problem with the fan on the processor that needs to be fixed.
The computer or laptop’s processor gets hot and the fan cools it so that there is no overheating and no trotting. If the fan won’t cope with the cooling, it is a sign of the error “CPU Fan” when you turn on your PC.

How to fix CPU Fan Error Press F1 to run SETUP
The fan itself may not be spinning because it is clogged with dust. In addition, the BIOS may set the wrong temperature range for revolutions that are not enough to cool the CPU. Let’s find out the ways and hints to fix CPU Fan Error at boot.
Examining the cooler
1. If the error “CPU Fan Error” when you turn on your laptop, when you boot up, pay attention to the laptop itself, or rather its side. There should be a grate where the hot air should be blown out. If the cooler does not make a noise and the air is not blown out, it is a sign that the cooler is not working.
You need to go to the service center or if you have experience disassembling laptops, then gently disassemble the laptop and see if it is clogged with dust. You may need to take out the fan and plug it into a different power source to see if it works.

2. If the error message “CPU Fan error” when your computer turns on, you need to take off the side cover of your PC and visually check the CPU fan, is it spinning, is it clogged with dust?
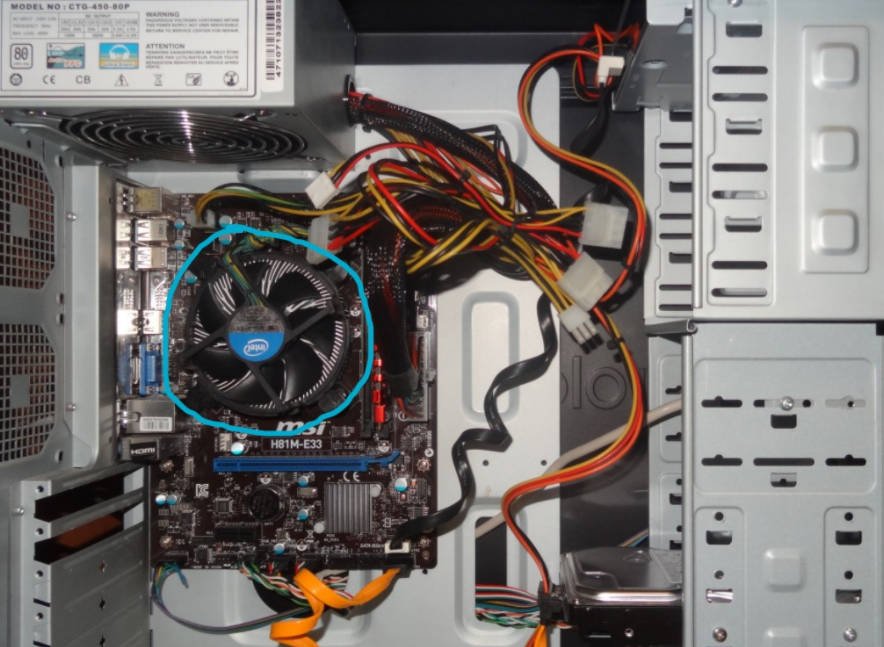
Also, pay attention to the connection of the fan, as many services and users may connect it directly to the power supply chips, which is wrong.
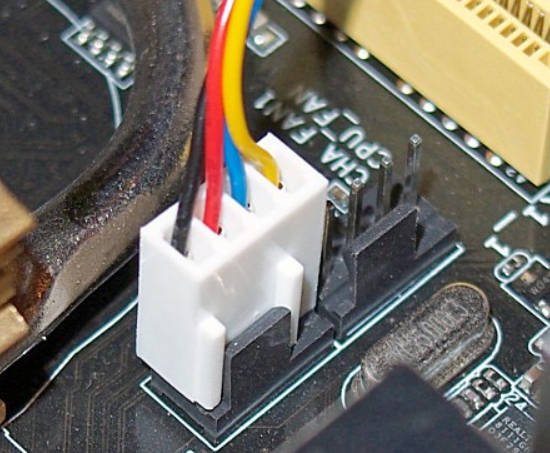
Look if the cooler is plugged into the motherboard socket, which is designed specifically for fans. It is signed as CPU_FAN, CPU_FAN 1, etc. It is also worth understanding the difference between 3-pin and 4-pin connection, which may affect CPU Fan error.

The 3-pin does not automatically adjust the speed of the cooler, and the 4-pin does, because there is a chip for that in these fans. To make it clearer, what a Pin is, it is the number of wires that go into the fan’s chip. In addition, you should pay attention to whether the chip is tightly connected to the motherboard, whether the metal terminal in the chip itself one of the pin.
2. BIOS settings
If after the above tips the fans work fine and they are connected correctly, let’s check the BIOS settings. When you turn on your computer or laptop immediately press the button on the Dell keyboard to enter the BIOS settings. The button may vary depending on your manufacturer.
In the BIOS, turn off the Smart Q-FAN option. It may have a slightly different name depending on your motherboard manufacturer. This will disable the cooler control, as many motherboards can force the cooler to run at minimum speed and in some cases automatically stop it because the temperature threshold is low. Press F10 to save your settings and exit the BIOS.
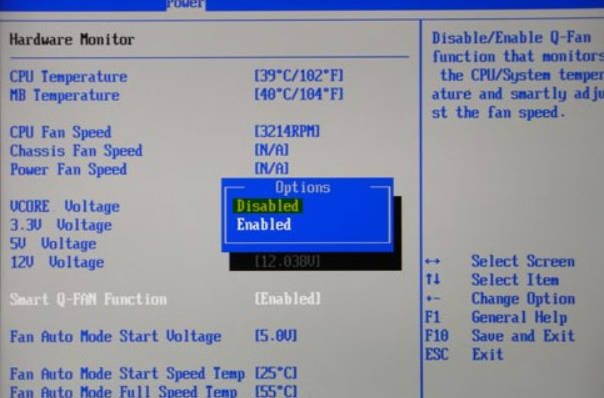
If there is a CPU Fan Speed column, select Ignore or Disabled to disable the fan speed control. Press F10 to save the settings and exit BIOS.
If you have a modern UEFI or similar settings, set the RPM to maximum. If that doesn’t work, just choose “Ignore”. Also, the column “CPU fan control” can be turned off. Press F10 to save your settings and exit BIOS.

Reset BIOS: If the BIOS settings seem complicated to you and you can’t find the fan control option on the CPU, a default BIOS reset may be a great solution. The item is called “Load Setup Defaults” and is in most cases in the Exit tab.

You can also remove the F1 error when you turn on your computer. To do that you have to find the box “wait for F1 If Error” and turn it off. Not all BIOSes have it.


