
How to fix webcam error in windows 10
After the latest updates of Windows 10, many old hardware drivers will not work correctly with the new operating system. You may receive a message stating that “we cannot find or launch your camera” with error codes 0xA00F4244 or 0x200F4244. Windows now has a new, system-wide option that will disable your webcam in all applications. A webcam that does not work may also be related to your antivirus software, driver problems, or privacy settings. Let’s take a look at a few tips that should help fix webcam errors.
1. Check the settings
If your webcam is disabled and no applications can use it, then most likely the parameter has changed with the new Windows 10 update (1809). Review the Windows settings to verify this problem.
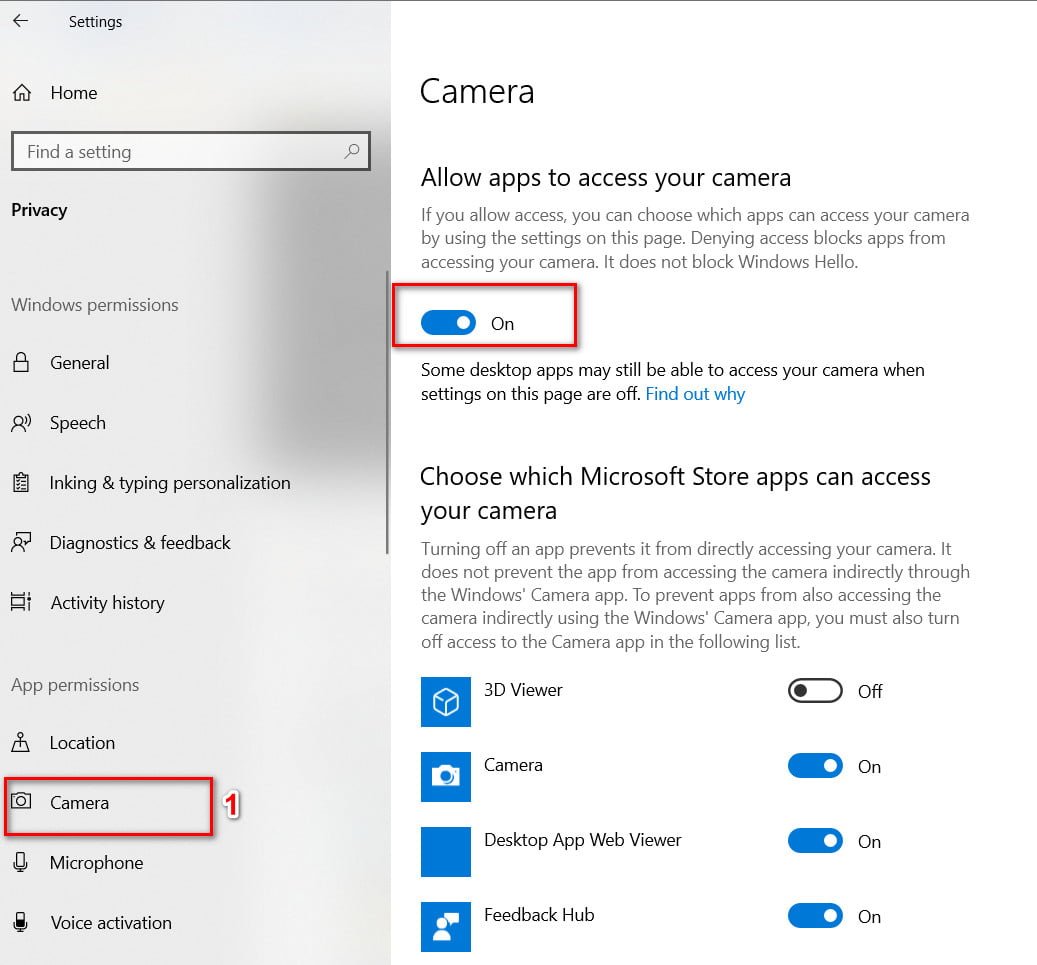
Open Settings> Privacy> Camera.
Further on the right side you will have access permissions for the webcam. Check that everything is turned on, and then restart the PC.
Related post : How to troubleshoot printer problems
2. Check Windows Device Manager
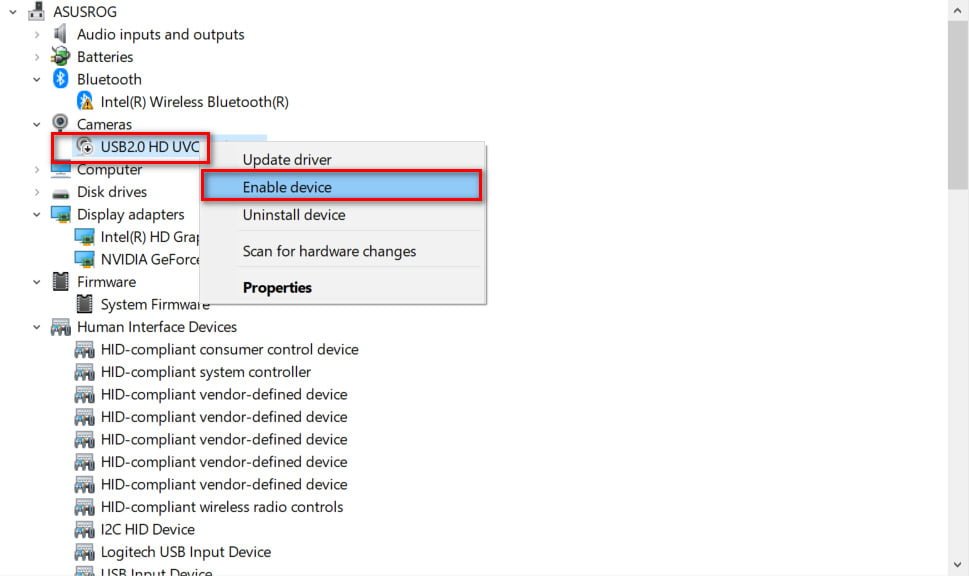
Press the key combination Win + R and enter devmgmt.msc to open the device manager.
Next, expand the “Cameras” list, right-click on the model and select “Enable Device”.
Related post : The flash drive does not appear in “My Computer”
3. Antivirus check
Anti-virus software designed to protect your privacy can sometimes affect your webcam’s ability to work with errors. Anti-Virus does not want the camera to turn on by itself and disable access to it. Check the settings of the antivirus, you can disable it for a while and check, or better remove your third-party antivirus. Built-in defender Windows 10 perfectly protects the system.
4. Install or update drivers
In most cases, Windows will install the necessary drivers when installing hardware, but sometimes the system has its own jambs and there may be old versions in the driver database. If your webcam is not working, you may need to visit the manufacturer’s website and download the driver. Let’s look at how to look outdated driver.
Log in to the device manager, click Win + R and enter devmgmt.msc.
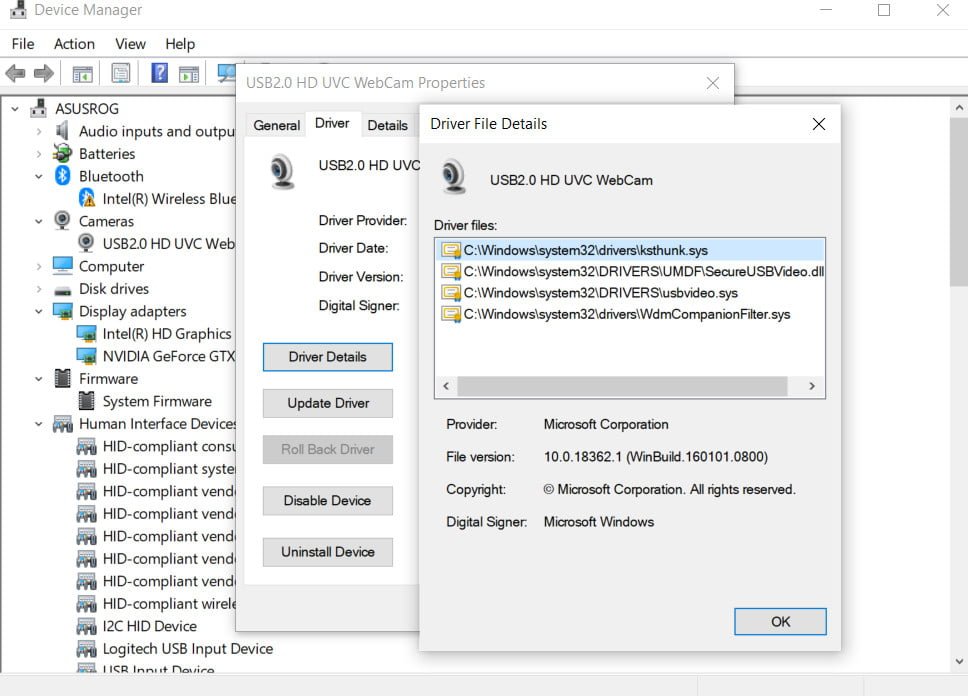
Open “Cameras” and right-click on the webcam model, and select “Properties.”
Go to the “Driver” tab and click “Details”.
Look for a file called “stream.sys”. If it is, your camera is outdated and cannot be used by Windows 10.
If not found, try rolling back the driver to the previous version by selecting “Driver Rollback” on the “Driver” tab. If it is inactive, you will not be able to perform this action, as there is no previous version of this driver.
Related post : How to turn off notifications in Windows 10
5. Remove the webcam driver
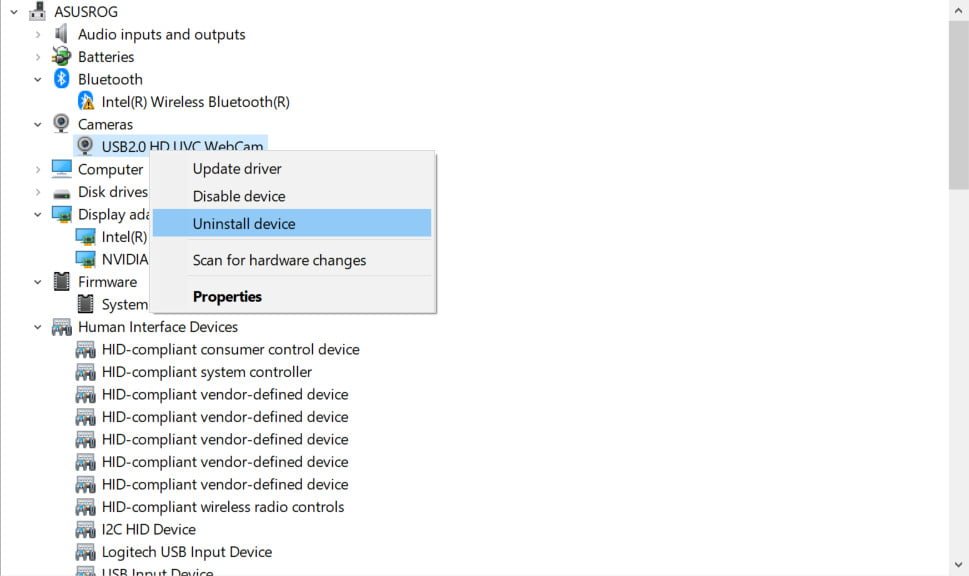
Go back to the device manager as described above, expand the “Cameras” list, then right-click and select “Uninstall Device”. Reboot the PC.
6. Check connections
If you have an external camera, and none of your applications can use a webcam, it is always worthwhile to ensure that all physical connections are secure. Simply unplug the power cord and plug it back in, making sure it is securely inserted. It is also possible that there is a problem with the USB port itself. Try connecting your webcam to a different port. Keep in mind that some newer laptops include built-in sensors for the webcam, so make sure that the camera is not closed or sealed.
7. Additional tips
If you have several devices connected (webcams, video capture and everything connected) connected to your computer, the application you are trying to use may try to select the wrong device. Your application may not support the webcam you are trying to use. For example, new applications for Windows 10 only support newly created webcams, so if you have an older version, it may not work with a new application. Most desktop applications are still compatible with older webcams. If you have an external webcam, connect it to another computer and see what happens.


