
How to take a screenshot on Windows
A screenshot or screen shot is an image taken on the screen of a computer or laptop. The screen shot is in most cases needed to be shown to specialists to solve the error shown on the screen or send them directly to social networks, instant messengers. It is very useful to take a screenshot of the screen of all sorts of open programs, browsers, you can fix funny pictures on social networks and just send to a friend by mail. In this guide, we will analyze many ways how to take a screenshot of the screen on a computer or laptop running windows 10. Each method will be unique for each user, depending on his preferences and conveniences.
Take a screenshot on Windows using Print Scrn button combinations
A button on a computer keyboard can be labeled differently “PrtScn”, “PrntScrn”, “Print Scr”. On some laptops, you may need to press the Fn + “PrtScn”, “PrntScrn”, “Print Scr” button combination to take a snapshot of the screen image and save it as an “.JPG” file. You can do it without saving the file by immediately copying it into the clipboard and pasting it on social networks on the wall or in posts. You can also select a specific area and capture one or another detail in the image. Well, let’s proceed step by step to the points starting with the fastest ways.
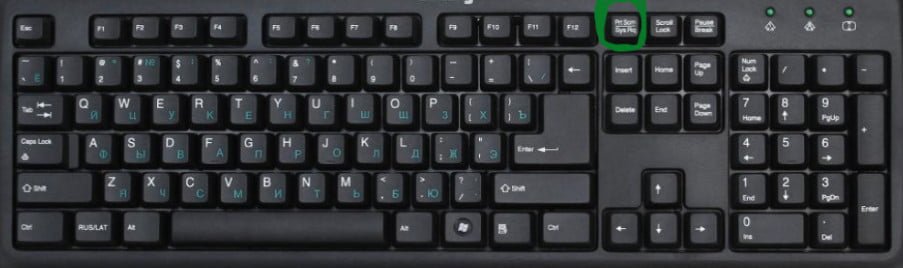
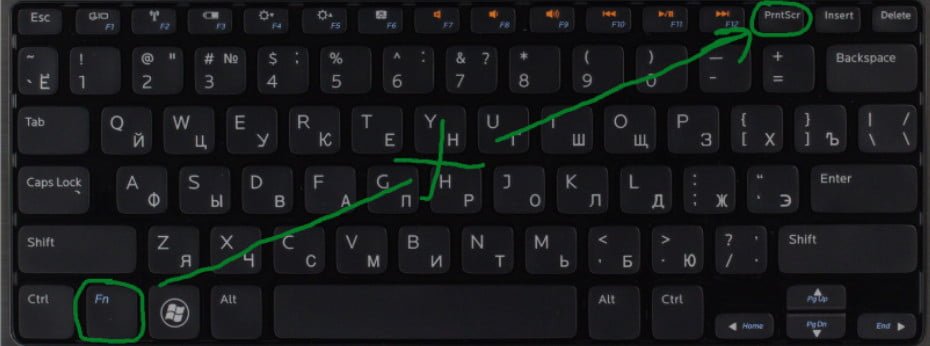
The approximate location of the Print Screen buttons on a computer and how to click on some laptops.
Computer
Related post : ERR_TUNNEL_FAILED Error in Chrome
A laptop

Related post : How To Delete Personal Data From A Photo In Windows 10
1)Take a screenshot on Windows by copying to the clipboard
Press the “PrtScn” key. Now a snapshot of your screen is copied to the clipboard. On some laptops and other devices, you may need to press Alt + Fn + PrtScn or simply Fn + PrtScn. Open your favorite editor, word or social network and paste it by pressing Ctrl + V.
2)Take a screenshot on Windows of the JPG file
Press the key combination win + PrntScrn (the button is indicated by the windows logo). If you use a tablet, then Win + volume down. On some Win + Fn + PrtScn laptops.
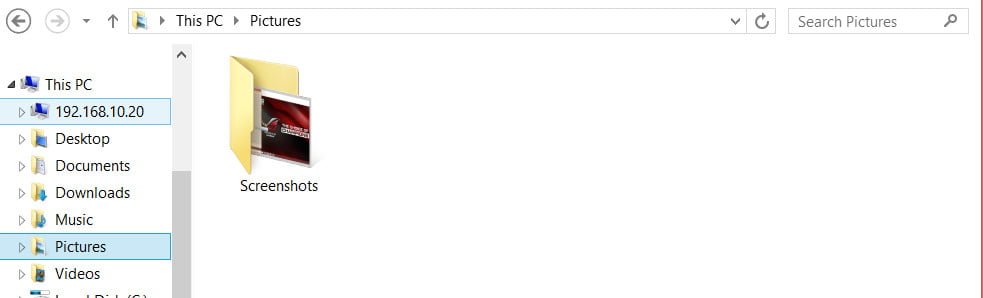
After clicking, the screen will turn off a little and you will see that the image will appear as a JPG file, and on the way open “This PC”> “Pictures”> “Screenshots”.
Related : HOW TO TRIM A VIDEO IN WINDOWS 10 WITHOUT USING A THIRD-PARTY APP
3)Take a screenshot on a computer with only one window
If you have many windows open and you do not want to close and minimize them, but you need to take a screenshot of only one window, then select the window in the first place by clicking on its title. After that, press the “Alt + PrtScn” button combination by copying the image to the clipboard and paste it into any editor by pressing Ctrl + V. Do not forget, on some laptops you may need to press Alt + Fn + PrtScn.
4) Take a screenshot of a specific area on the screen
Click “Win + Shift + S” and after clicking capture the area of the screen that you need. A snapshot of your chosen area will be copied to the clipboard. You can paste it into any application, social networks, word by pressing Ctrl + V. This method only works in windows 10 Creators Update.
5)Take a Screenshot on computer using scissors tool
The Scissors tool allows you to take a screenshot of an open window, a rectangular area, a free-form area, or the entire screen. After taking a picture, you can edit it with different colored pens or a marker, save it as an image or an MHTML file and send it to a friend. To run the application, type in the search windows, the word “scissors”. For example, I use this convenient tool for cutting instructions on the site.


