How to change Microsoft app store download location in Windows 10
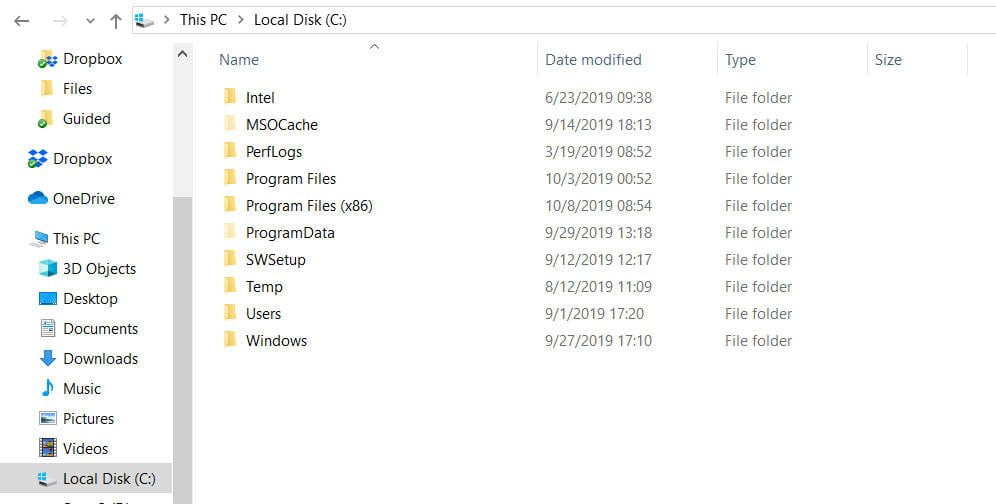
Classic applications (UWP) installed from the Windows Store are installed by default on the same drive on which Windows 10 is installed. All applications are saved by default in the “C: \ Program Files \ WindowsApps” folder. The WindowsApps folder is not accessible without changing permissions. If the system disk of your PC is quickly filled, you can consider changing the location of applications that are installed from the Windows 10 store. You can use another local disk to install applications, as well as transfer applications that are already installed. Let’s look at how to change the download and install a different application location for the Microsot Store in Windows 10.
Important: Some applications can not be installed or moved to another disk, they are installed only on the system, where the system itself. If the application does not support installation on a non-system disk, you will see the message “This is necessary to install on the system disk” when you try to install the application.
How to change the installation location of applications in Windows 10
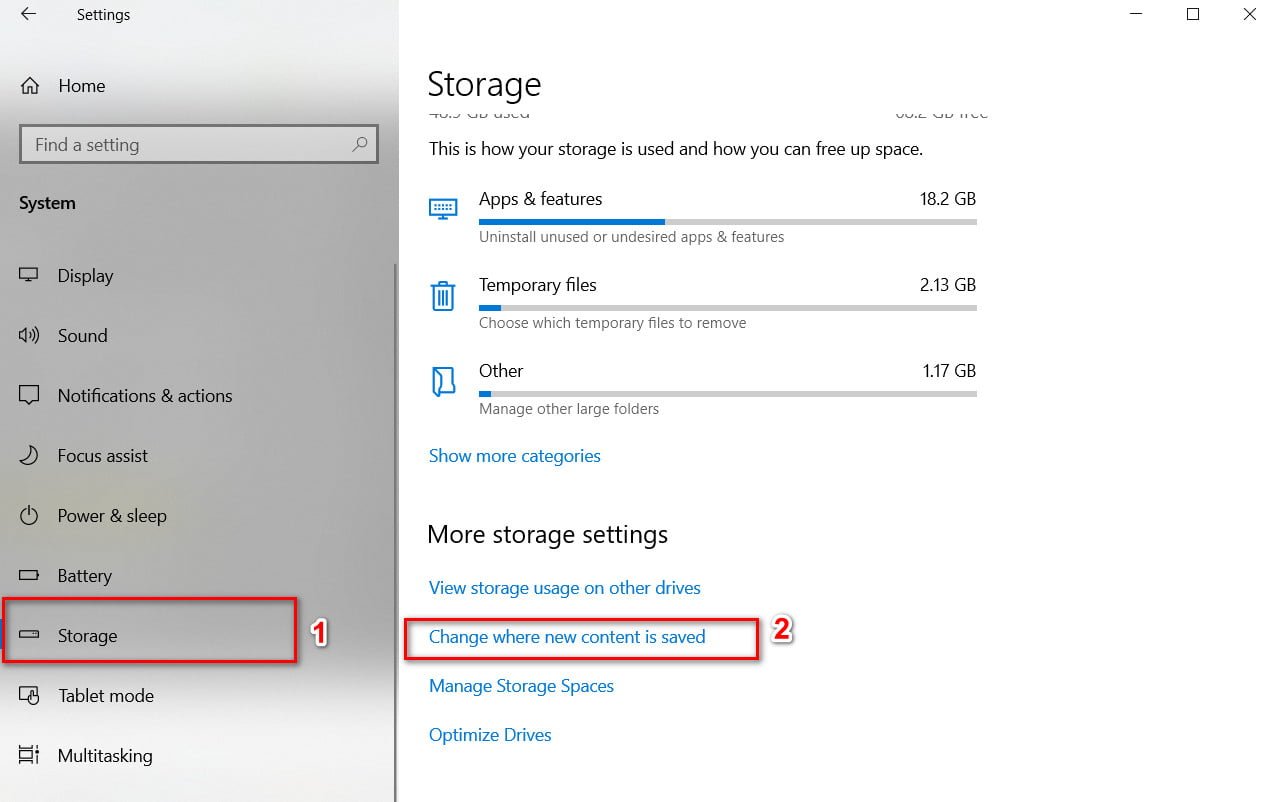
Step 1. Open “Settings“> “Storage”> “Storage” click on the “Change where new content is saved” link.
Related post : Pin the site to the taskbar or start menu in…
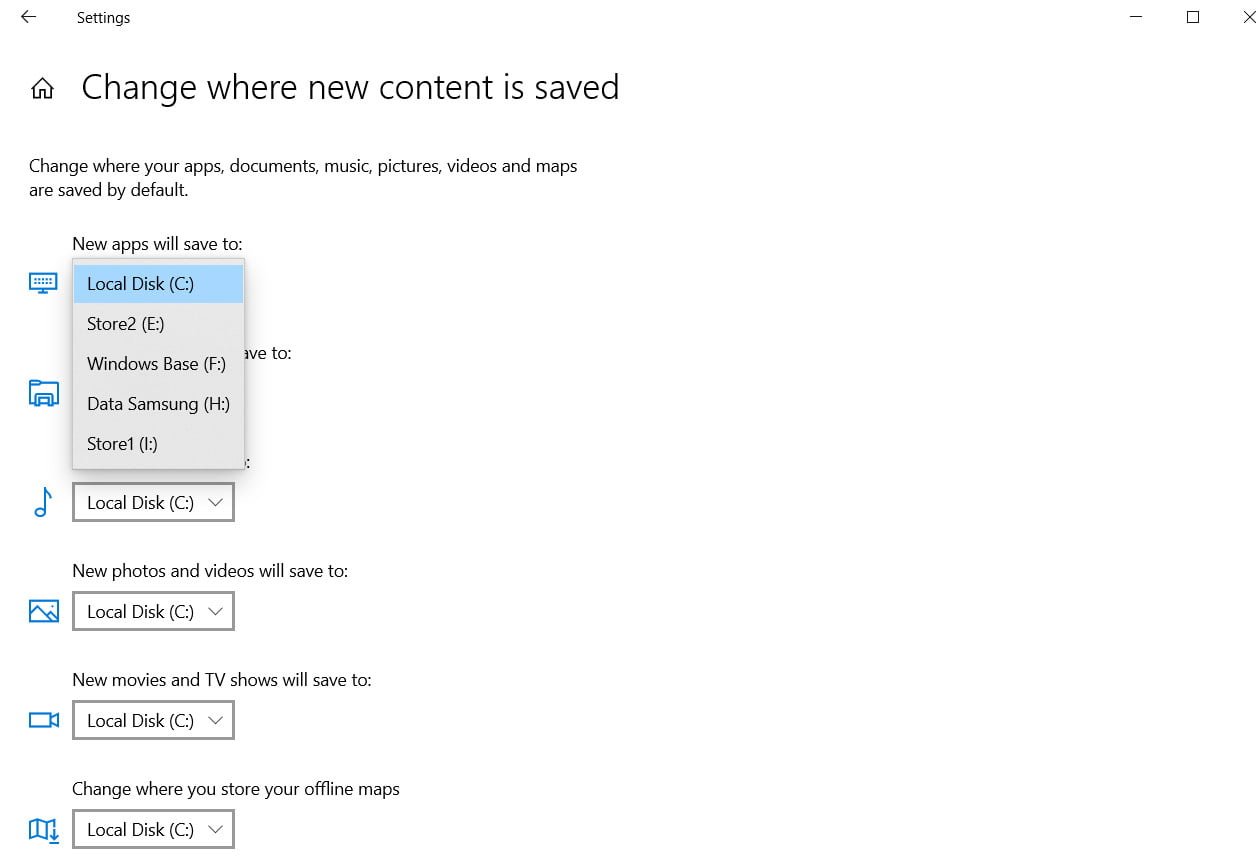
Step 2. Find the column “New apps will save to” and specify your place. From this point on, when you install new applications from the store, the new place will be used to install it. Windows 10 automatically creates a folder called WindowsApps in the root directory of the selected drive and saves all installed applications in this folder.
Related post : How to fix the ACPI_BIOS_ERROR error in Windows 10
Change installed applications in Windows 10
If you have already installed many applications from the store on the system disk with Windows 10, you can move them to another disk without reinstalling them. It is worth noting that not all applications support the transition to a new place.
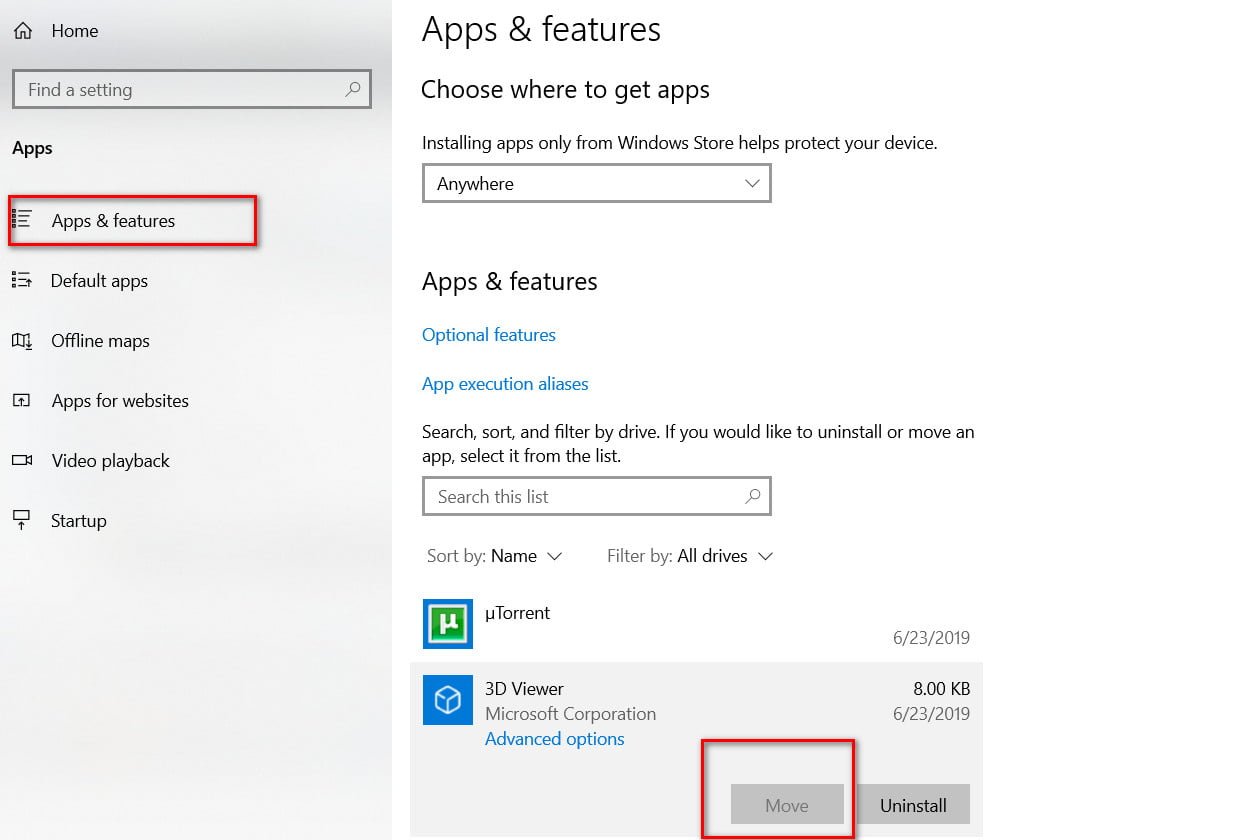
Step 1. Open “Settings”> “Applications”> “Applications and Features”> on the right, find the application you want to move and click on it. Click the Move button, select the disk where you want to move the application, and then click the Move button again to move the application to a new location.
Windows 10 Tips :
HOW TO HIDE THE SSID OF THE WI-FI NETWORK IN WINDOWS 10
HOW TO TURN OFF NOTIFICATIONS IN WINDOWS 10