How to migrate dhcp server to another Windows Server
If you have ever been forced to move a DHCP server from one physical server to another, you know that this process is not completely simple and intuitive if your DHCP server is running Windows Server 2003. Fortunately, when Microsoft developed Windows Server 2008, they completely redesigned the administrator interface, the migration of a DHCP server in which was significantly simplified. In this article I will show you how to carry out the transfer of a DHCP server to a Windows Server. (Short FAQ on DHCP)
Migrating DHCP to Windows Server 2003
Since this article should be about Windows Server 2008, I don’t want to talk too much about Windows Server 2003. However, I’ll give a brief overview of the DHCP server migration process in this version of Windows.
To transfer DHCP to Windows 2003 Server, the first thing you need to do is stop and then disable the DHCP service. Naturally, this means that clients will not be able to use a DHCP server to obtain IP addresses until the migration process is completed. Then you have to copy the \% systemroot% \ system32 \ DHCP folder to some safe place that can be used later. Having done this, you must remove this folder from the source server.
Next, you will have to do some work using the registry editor. As always, when working with the registry editor, you should make a backup copy of it, since incorrect changes can thoroughly destroy Windows. Go to the registry key HKEY_LOCAL_MACHINE \ SYSTEM \ CurrentControlSet \ Services \ DHCPServer \ Configuration. Now, select the Save Key command, and export this registry key to a safe place. When you are done, you can remove the DHCP server component using the Add / Remove Windows Components wizard.
Restore DHCP server in Windows Server 2003
Before you can restore the DHCP server from your backup, you must first install the DHCP server component on your new server, and right after that, you must stop and temporarily disable the DHCP service. Now go to the backup directory that you created earlier and find there a file called System.mdb. If this file exists, rename it to system.src. Now you have to copy all the files from the backup directory to the new server in the% systemroot% \ system32 \ DHCP folder.
Now you can restore the backup of the registry you created earlier. To do this, open the registry editor and go to HKEY_LOCAL_MACHINE \ SYSTEM \ CurrentControlSet \ Services \ DHCPServer \ Configuration. Select the Restore command from the registry editor menu, and then restore from a backup of this branch from another server you created earlier. When done, close the registry editor, reboot the machine, and then turn on and start the DHCP service. This completes the DHCP server migration process. You got a fully functional server with the same settings.
Migrating DHCP to Windows Server 2008
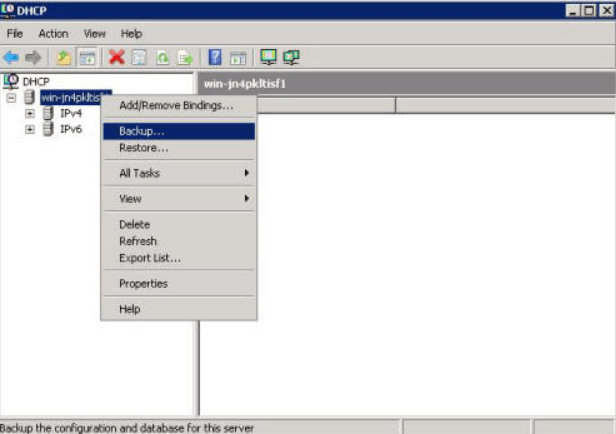
As you have seen, moving a DHCP service from one server to another in Windows Server 2003 was not a very convenient procedure. Fortunately, this process is much simpler in Windows Server 2008. To get started, open the DHCP Manager in the administrative menu. When the console opens, right-click on the server name, and then select the Backup command in the pop-up menu that appears.
Migrating DHCP Windows Server 2008
When you do this, Windows will ask you to specify the location of the backup file you are planning to create. After selecting the folder, click OK, and the backup file will be created.
Related post : How to migrate dhcp server to Windows Server
Restore DHCP server in Windows Server 2008
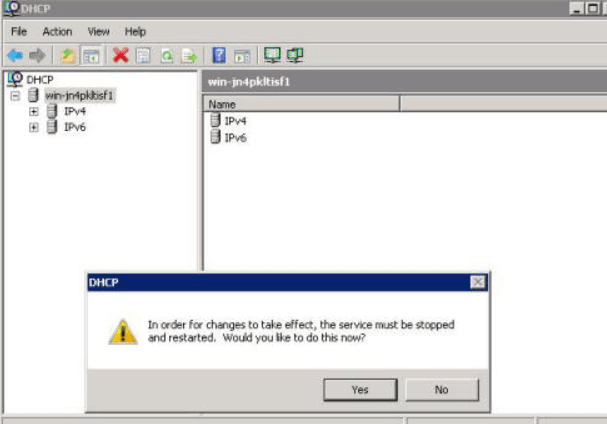
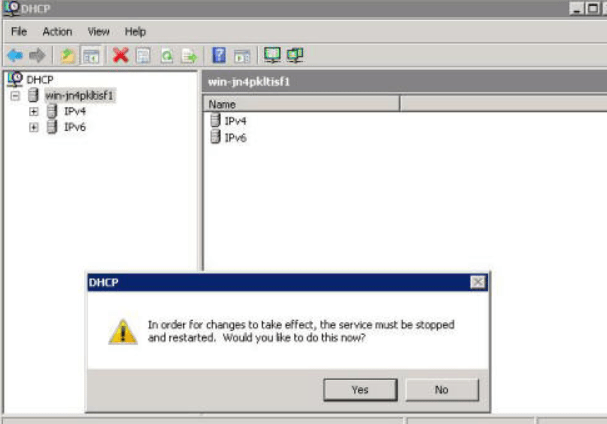
Microsoft has greatly simplified the process of restoring a DHCP server. To do this, simply open the DHCP management console, right-click on the server that you want to restore from a backup, and select the Restore command from the context menu. Now just specify the path to the backup from which you want to recover, and click OK. Windows will then stop and restart the DHCP Server service. Then click Yes, and recovery will begin. When the process is completed, the DHCP server service will automatically restart with the new settings.
Related post : How to run 32-bit applications in 64-bit versions
Restore DHCP server
Conclusion
In this article, I told you how you can transfer a DHCP server configuration from one server to another. Keep in mind that regardless of whether you are performing this procedure on Windows Server 2003 or Windows Server 2008, you must disable any DHCP server that contains conflicting areas (scope) before performing the recovery process.

