How to fix Operation could not be completed error 0x00000709
One of the most unpleasant problems with the printer is that it refuses to be configured on your computer. When he has problems with the configuration, one of the common errors he gives is “operation could not be completed error 0x00000709 “ . This happens if a configured default printer is already installed or Windows does not want to set up a new printer at all. The error message is as follows:
Operation could not be completed (error 0x00000709). Double check the printer name and make sure that the printer is connected to the network.
Methods to fix Operation could not be completed 0x00000709 error
1. Run the printer troubleshooter to fix 0x00000709 error
The quick option is to download and run a special utility from Microsoft to fix printer problems. If the utility did not help or you do not want to download it, then press the Win + R button combination and enter msdt.exe / id PrinterDiagnostic and follow the instructions on the screen.

Related post : How to backup the Windows registry
2. Update Printer Drivers
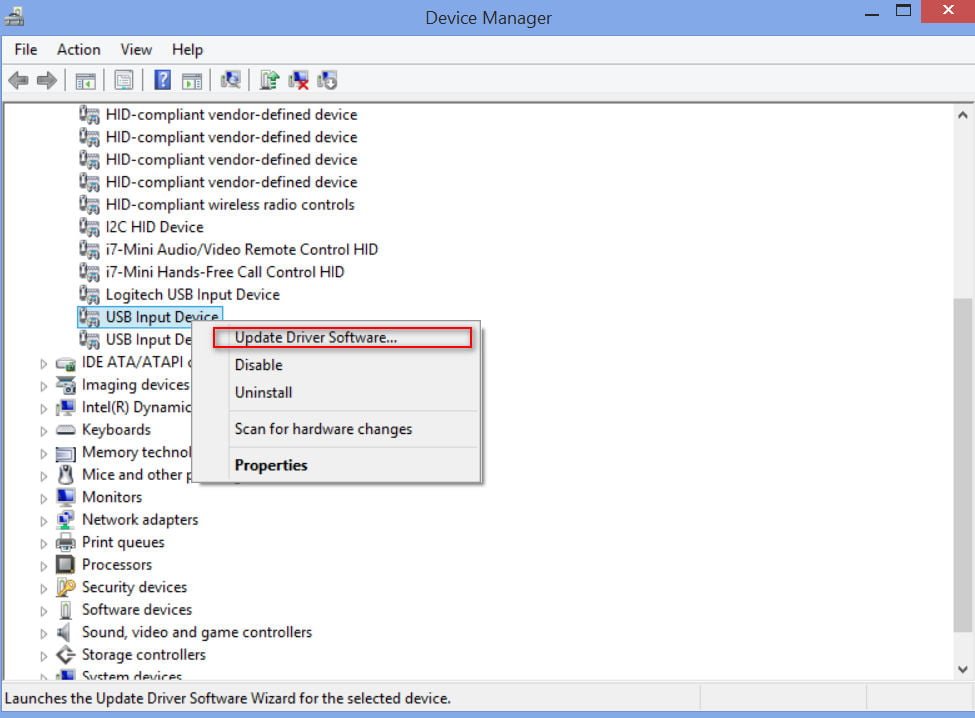
You should update the printer drivers. Click Win + R and enter devmgmt.msc to open the device manager. Next, find the USB Controllers and expand the list by clicking on the arrow on the side. Find the line “Composite USB device” and update them all by right-clicking on them and selecting “Update driver”. Reboot the computer.
Related post : HOW TO TROUBLESHOOT PRINTER PROBLEMS
3. Use Registry Editor
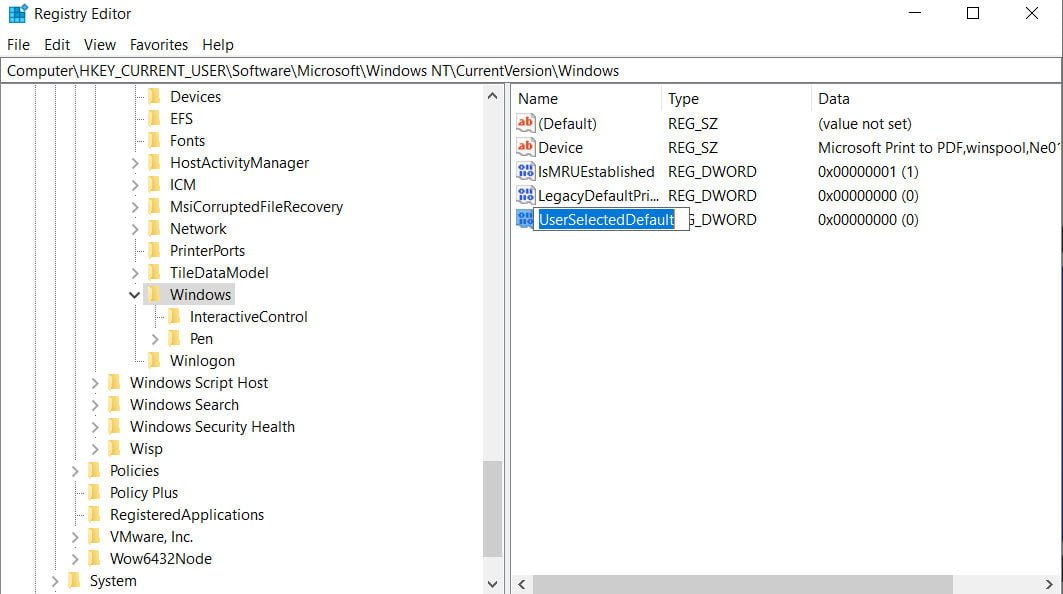
Click Win + R and enter regedit to open the registry editor. Next, follow the path:
HKEY_CURRENT_USER \ Software \ Microsoft \ Windows NT \ CurrentVersion \ Windows
Step 1. On the right you will see Device, double-click on it and in the “value” field write your printer name and click OK. The message: “Can not edit device: error writing new content.” Click OK again. The name of the printer can be viewed in the control panel “Control Panel \ Hardware and Sound \ Devices and Printers”. Do not close the registry, but follow the below step.

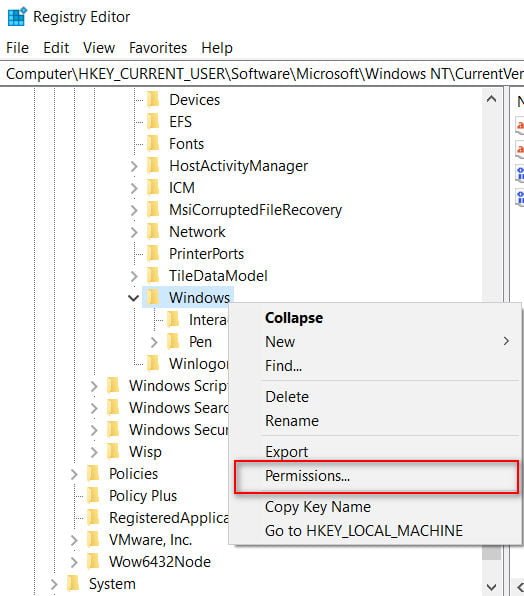
Step 2. Now right-click on the Windows folder and select “Permissions …”.
Related post : How to fix Black Screen after updating Windows 10
Step 3. Very important! Find the group Restricted and remember, write down, take the default parameters before proceeding to the next settings. Next, in the column “Allow”, put two checkboxes “Full access” and “Read”. Now click “Apply” and then “OK.”

Related : HOW TO FIND A PRINTER IP ADDRESS
Step 4. After that, right-click on the file named UserSelectedDefault and select Rename, and rename it to the name of your printer. Restart your computer for the changes to take effect. Important! After you have added the printer, do not forget to return the permissions you made, as in step 3, back as they were, by default.